The process of testing and repairing electrospindles, as we face it in GDM, is summarized in 7 points. We follow them to the letter and that is what the quality finish of our repairs is based on. As you can see, we take images of the entire process, generating a documentary base of all our repairs. We want to offer the greatest possible guarantee to our clients, which is why we believe in the importance of being methodical.
1. visual inspection: beginning of the electrospindle testing and repair process.
- Data collection of the engine and start of the test sheet. In this process we check if we have technical information of the equipment in our database.
- Review of the information provided by the client (type of breakdown, technical data).
- Motor shaft: inspection and photography.
- Power and control connectors: inspection and photography.
- Damage to the outside of the engine: inspection and photography.
2. motor stator check.
- Checking the insulation of the motor windings.
- Checking the resistance between coils.
- Measurement of the temperature probe and annotation of the values in the test sheet.
Magnetic sensor

Optical sensor.
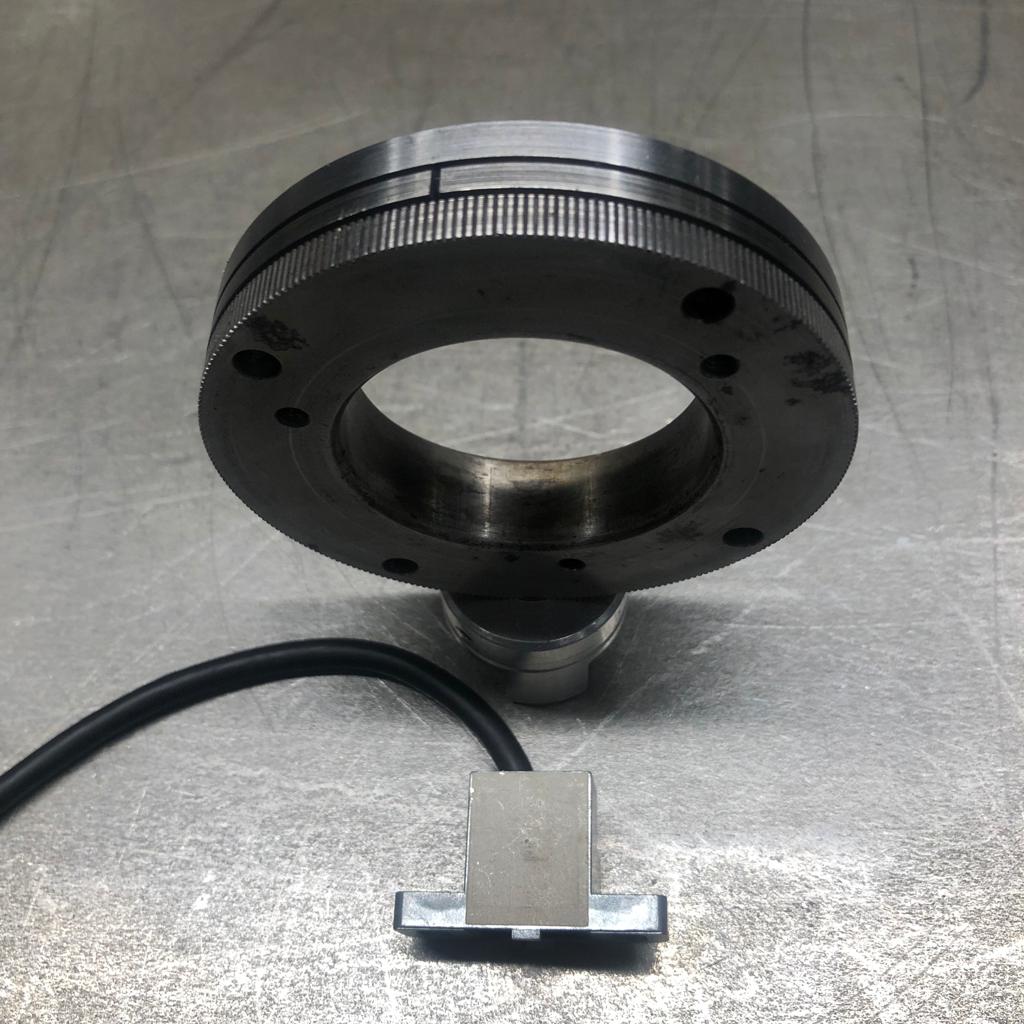
3. encoder.
- Identification of the type of encoder that incorporates the motor (magnetic sensor or optical sensor) by taking photographs and writing down the model and other data on the test sheet.
- Checking the status of the encoder using the test equipment or test benches available depending on the brand.
- If we do not have information in our files, we will proceed to take data on the adjustment and connection of the encoder. For this, external sources or those of the client will be used.
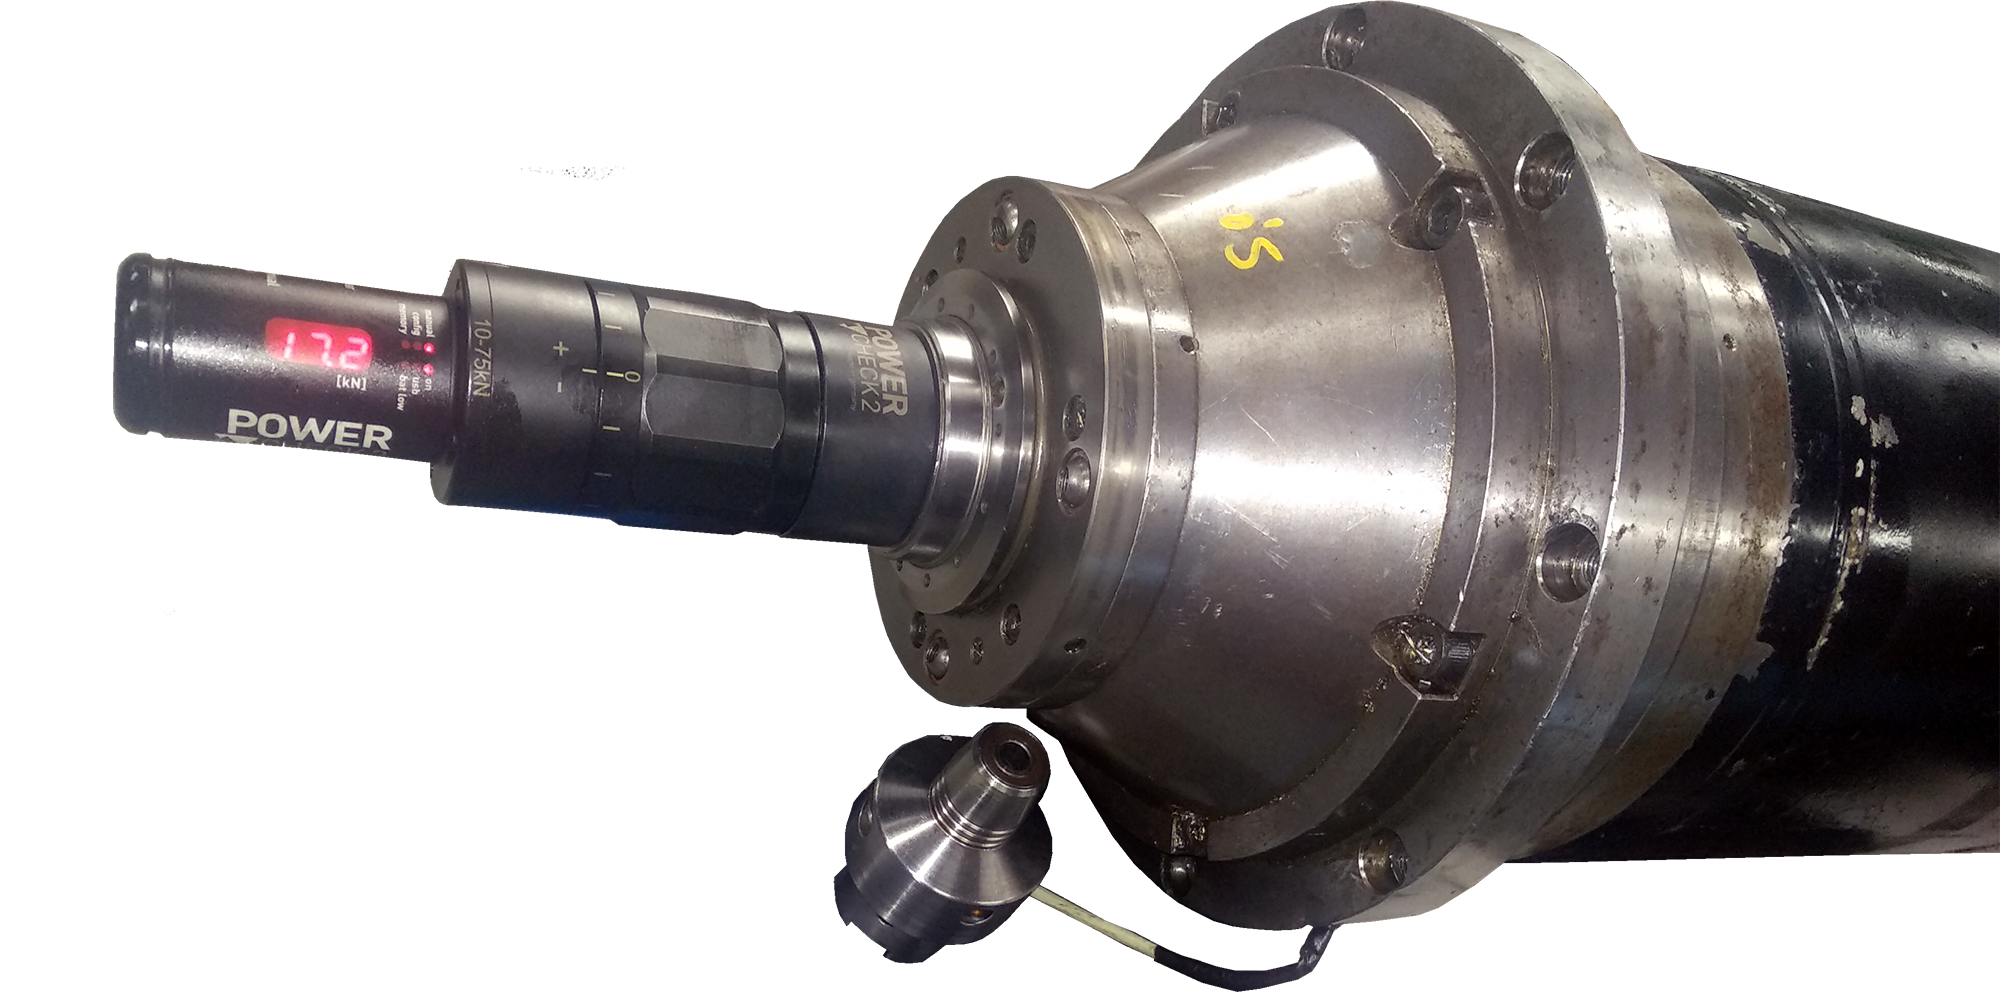
4. Tool clamping system.
 Inspection of the condition of the cone, measuring the axial jump, using a 300mm long standard tool and checking with the dial gauge that this jump is within the permitted tolerances.
- Checking the clamping force of the tool, using a torque meter, noting the value on the work sheet.
- Checking the condition of the collet and tool-holder claws in case they need to be replaced.
- Sensors that indicate the status of the tool in the motor (inductive, capacitive, etc.): review and control.
Review of the tool tensioning system, replacing if necessary the type of spring used (Belleville washer, spring, etc.). - Repair of the cylinder of the tool change system (pneumatic, hydraulic, etc.).
5. engine cooling system
- Checking the state of motor cooling, whether hydraulic, pneumatic, or forced ventilation with a fan.
- Replacement of the gaskets that allow a correct sealing of the engine.
- Tool cooling rotating union check.
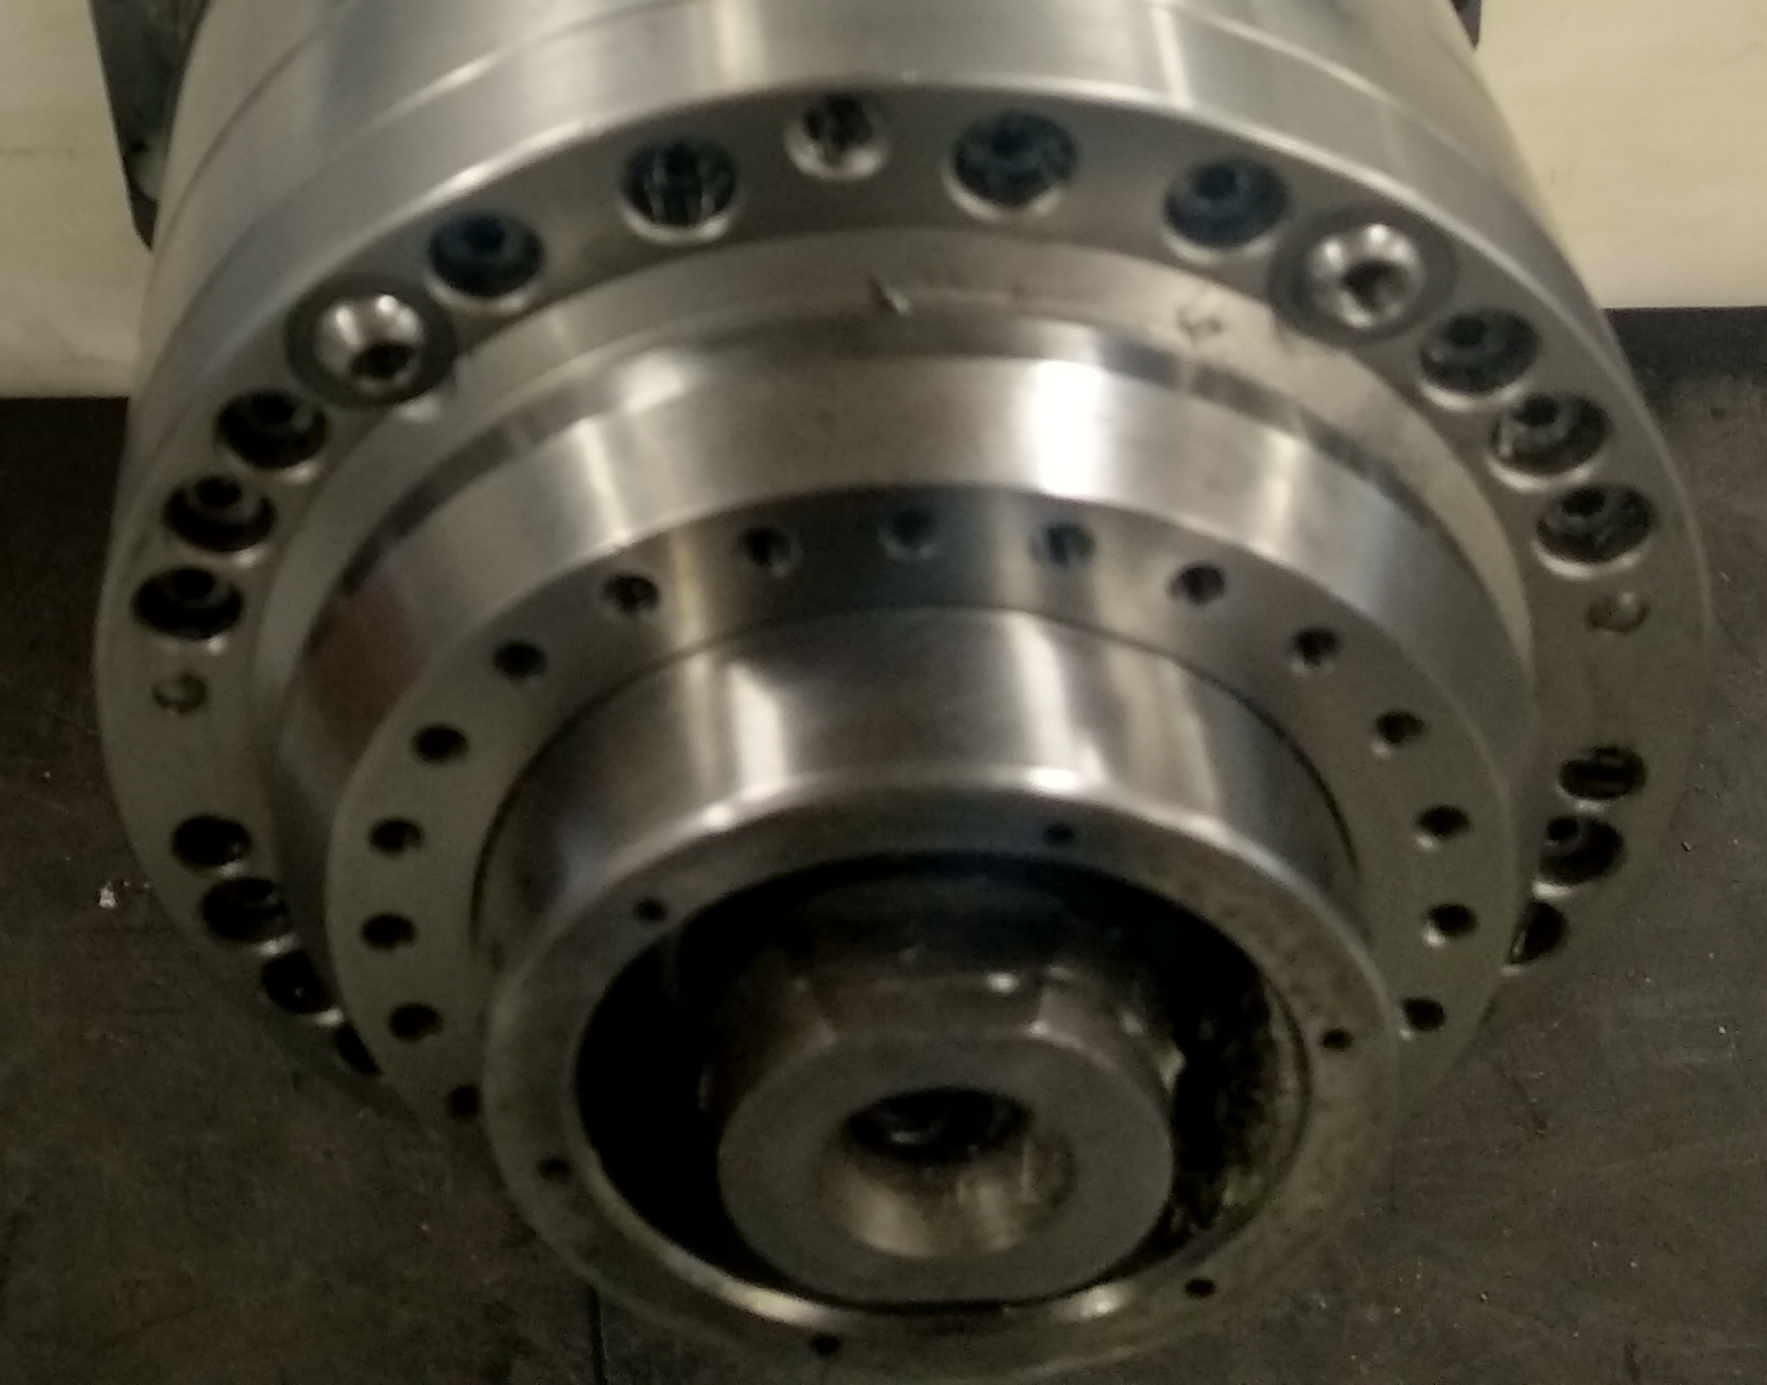
6. disassembly.
- Status of the front and back covers, photographing them and noting their status on the test sheet.
- Checking the position of the bearings and their condition.
- Clearance of the bearing seats with the interior tester, photographing it and writing down the results on the test sheet.
- Checking the bearings by photographing them and writing down their condition and model on the test sheet.
- Condition of spacers, nuts and other parts prone to wear.
- Bearing lubrication system (oil, grease, …).
7. final test.
As a final point of the electrospindle testing and repair process, a final revision is carried out consisting of:
- Measurement of the axial jump of the cone.
- Measurement of the clamping force of the tool.
- Setting and checking of the tool clamping sensors.
- Adjustment and verification of the coding system that incorporates the engine.
- Review of the engine cooling system, checking that there are no leaks in the circuit.
- Review of the bearing lubrication system.
- Running the engine at different revolutions, controlling consumption, temperature, etc., to ensure a correct adjustment of the bearings.
- Dynamic balancing of the rotor to ensure that the vibration level is at the correct levels.
Once the entire process is finished, the repaired engine is prepared for shipment to the customer. Here we leave you a video in which we explain this process.